
The Create Campaign form is where you configure your outbound messaging campaign. You’ll set up all the details here, from who will receive the message to the content of the message itself.Documentation Index
Fetch the complete documentation index at: https://docs.chatzy.ai/llms.txt
Use this file to discover all available pages before exploring further.
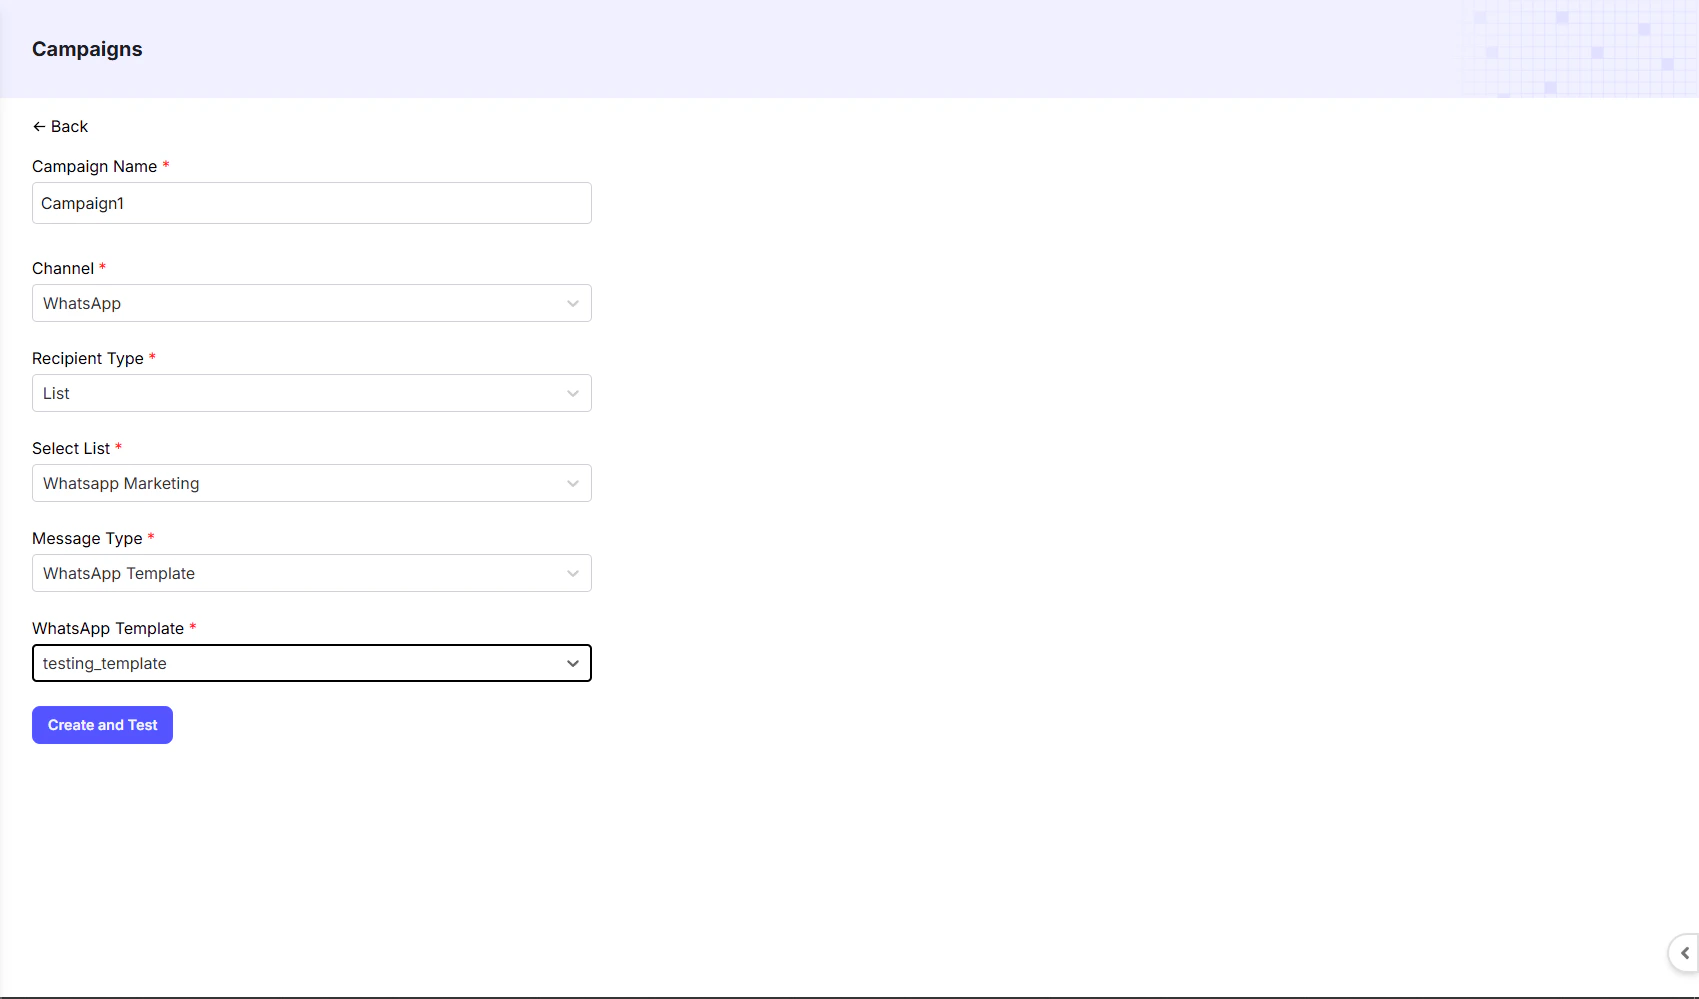
- Campaign Name: This is the name you give your campaign for easy identification on the dashboard.
- Channel: Select the platform where you want to send your messages, such as WhatsApp.
- Recipient Type: Choose the type of audience for your campaign. The screenshot shows List, meaning you can send the campaign to a specific group of contacts.
- Select List: After selecting “List” as the recipient type, you choose the exact list of contacts who will receive the campaign messages.
- Message Type: Select the format of your message. For channels like WhatsApp, you will need to choose a WhatsApp Template. These are pre-approved messages required by the platform for outbound communication.
- WhatsApp Template: Choose the specific message template you want to use for the campaign. This template must be pre-approved by WhatsApp.
- Create and Test: Clicking this button will finalize your campaign setup and allow you to test the message before it’s sent to your recipients.
Campaign Preview
The Campaign Preview page allows you to review and test your campaign before sending it to your audience. This ensures the message looks correct and the flow works as expected.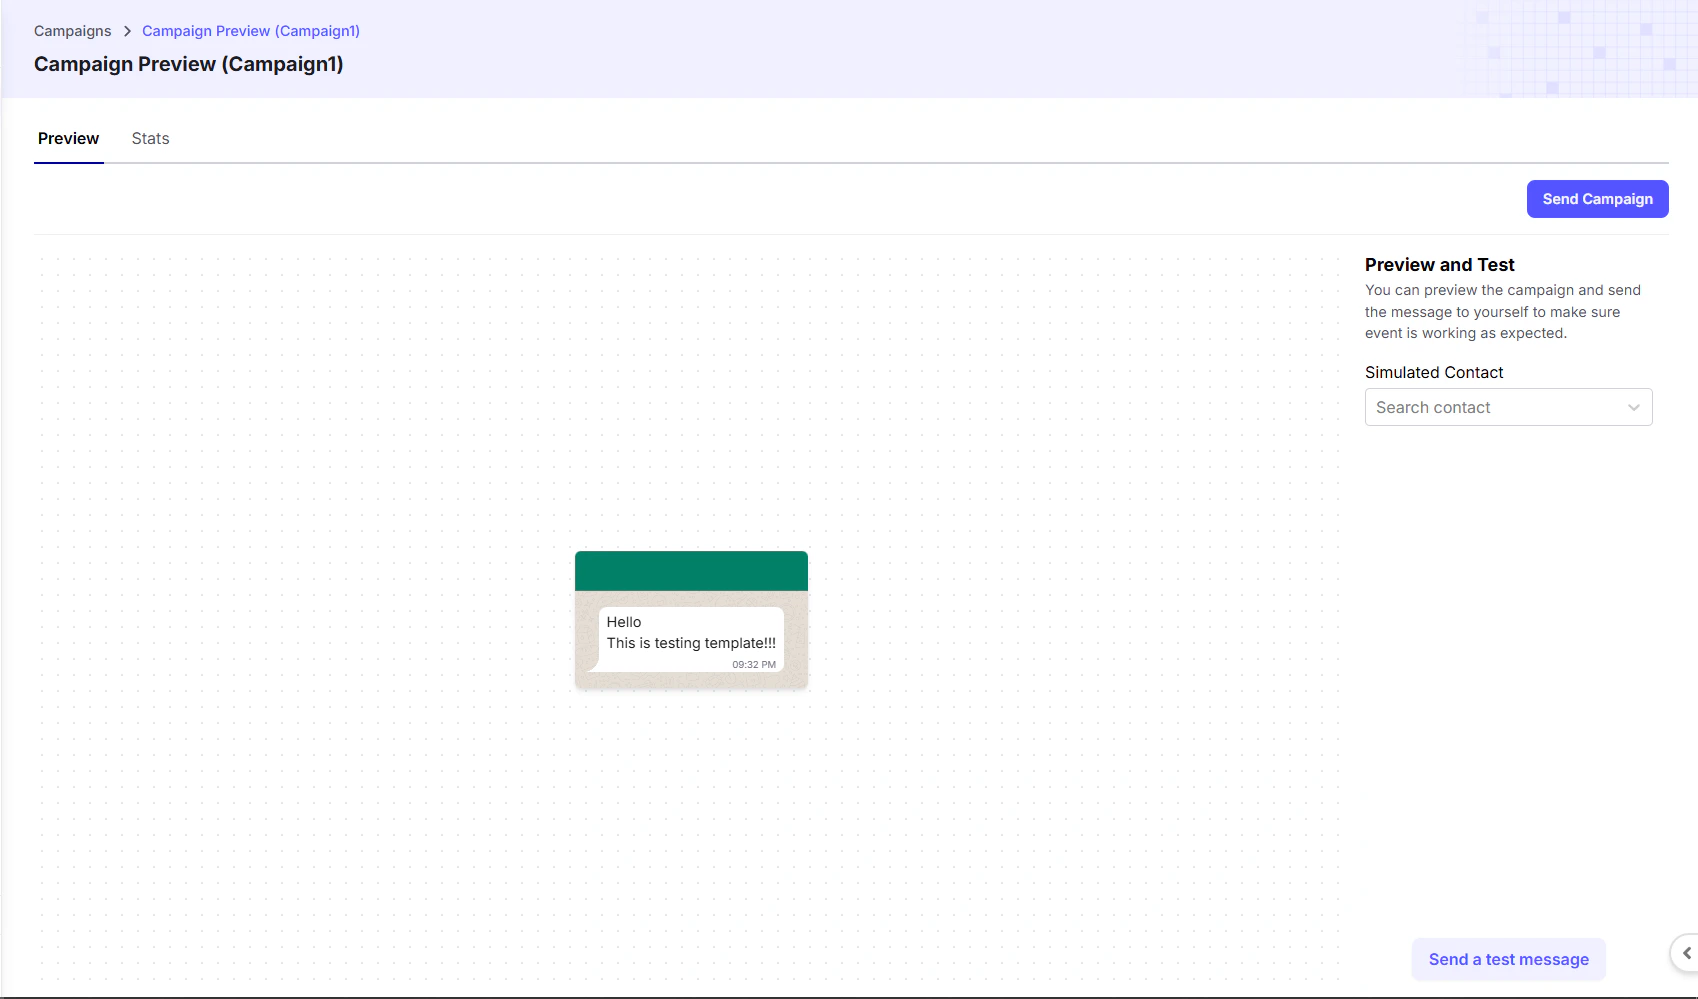
Preview & Stats
- Preview: This tab gives you a visual preview of what your campaign message will look like on a mobile device. You can verify the content and formatting here.
- Stats: Once the campaign is sent, this tab will display analytics and statistics, such as delivery rates, open rates, and click-through rates.
Preview and Test
Before you send your campaign to all recipients, you can send a test message to yourself or a specific contact to ensure everything is working correctly.- Simulated Contact: Use this dropdown to select a contact to receive the test message.
- Send a test message: Clicking this button will send the campaign message to the selected contact, allowing you to see exactly how it appears on the target channel.
Send Campaign
Once you are satisfied with the preview and tests, you can send the campaign to your recipients:- Send Now: Immediately sends the campaign to the selected list of recipients.
- Schedule: Allows you to schedule the campaign for a specific date and time, ensuring it reaches your audience at the optimal moment.